
For a recent project, I needed to render rigid body physics for a few motion graphics elements. For basic 3D compositing I use MotionVFX’s mo2 (soon to be replaced by mo3). However, since mo2 has to work in realtime within Apple Motion, it has lots of limitations, one of which is no support for any dynamics. I found a workaround: baking dynamics into FBX F-curve animations.
This is a pretty straight forward solution, and how much hassle is involved depends on the 3D modeler you’re using. I re-used a model of a microSD card I recently created in my modeler of choice (Cheetah) and used Cheetah’s Bullet integration. Bullet is a dynamics engine that supports a range of features, including rigid body and soft body dynamics, and effectors (or forces). These are all standard features of any modern modeling package and you should be able to follow along in Blender, C4D or whatever else you’re using.
For this technique to work, each “particle” has to be a separate mesh within the scene. This will then show up as a separate mesh object in the FBX hierarchy and mo2. The main problem with this approach is performance. Separate objects perform much worse during the simulation than particle-systems that instantiate the same reference object.
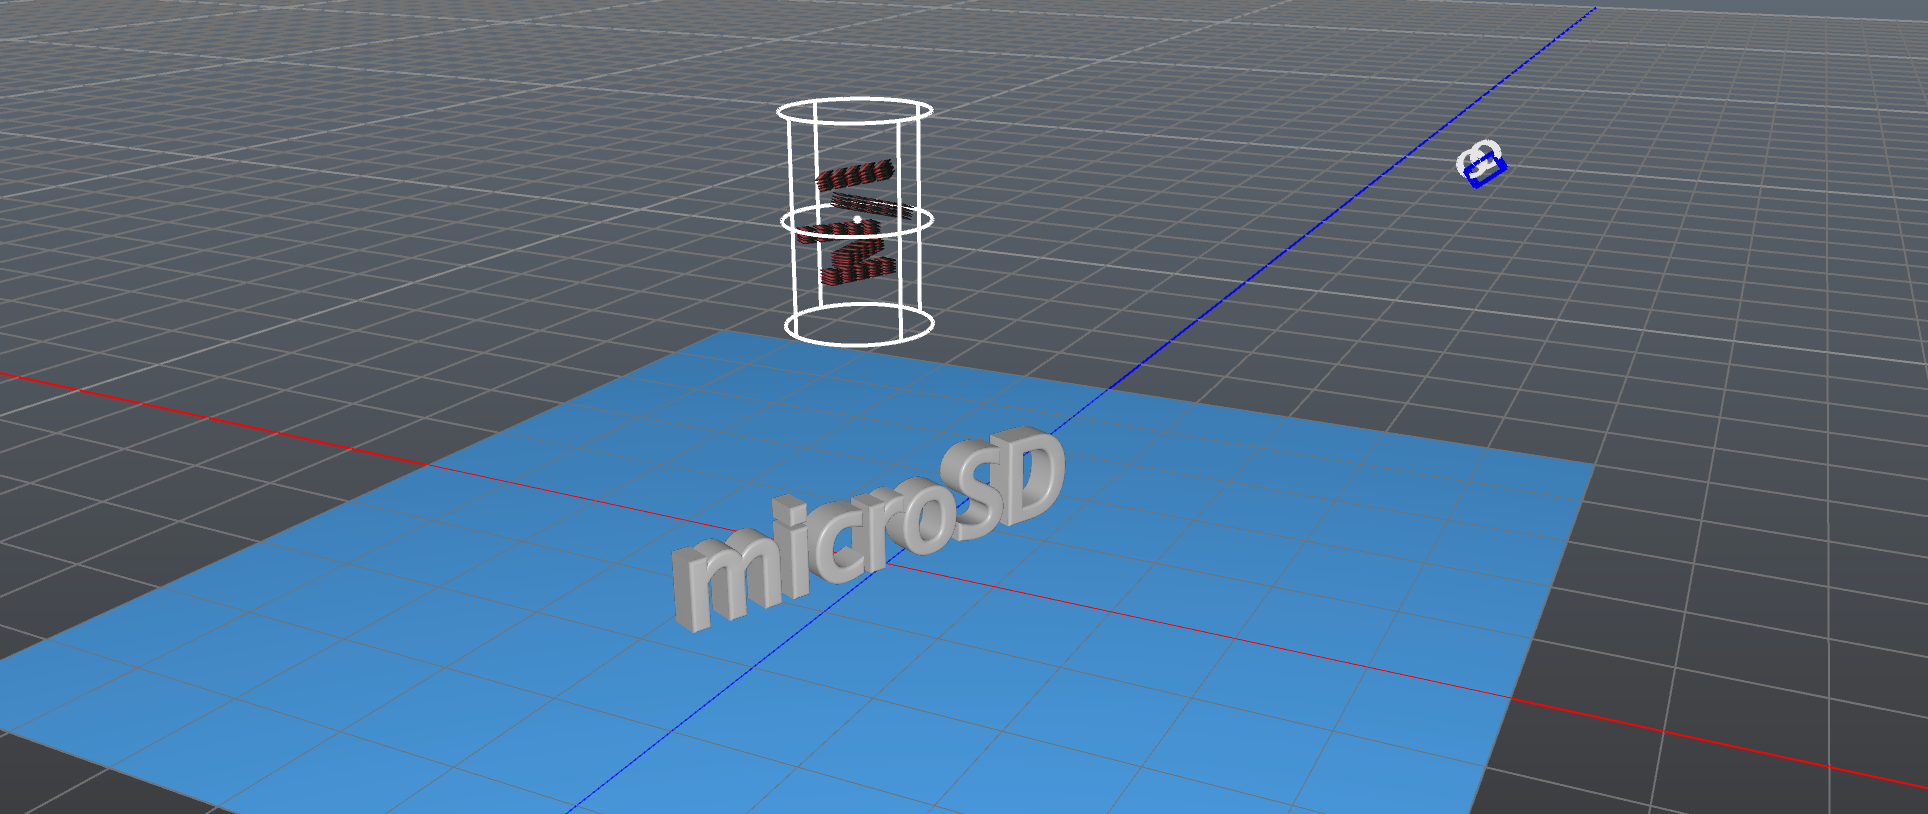
Before we worry about that though, we need to set up a scene. For this demo I went with:
- a floor: a plane
- a hit target: extruded text
- an effector: a cylindrical turbulent force effector helps to “throw” the SD cards down with a satisfying twist
If dynamic objects are allowed to interact with a complex but static shape, the added disturbance and physical complexity make the result much more enjoyable and communicates to a viewer that this isn’t hand-key-framed animation. Here’s my scene setup in Cheetah 8.
The plane and text get a rigid body tag. A tag in Cheetah is an extended object property page, in this case it connects the object it tags to the dynamics engine and sets up the basic physical properties of the object.

The rigid body tag for the floor plane is “static”, i.e. it doesn’t move. The “concave” collision model means the faces of the mesh itself are used to calculate the collisions, rather than a bounding box or shaped hull. As the name implies, this is required for concave objects, since other objects may need to penetrate its bounding box, but also increases simulation precision at the cost of performance. Since we’re not trying to get good realtime performance in Cheetah, this isn’t relevant - crank everything up. Cheetah has several other precision levels that I needed to turn up to the max, and you’ll likely have to do the same. Look for parameters like “margin”, “precision”, “dynamics sampling”.
I later tuned the frequency of the cylindrical turbulence effector until I got a pleasing visual result from the “throw”.
The next step is to manually instantiate multiple copies of the object. I’d keep it below 100 for use in mo2. This can be scripted if your modeler supports that. Make sure the initial object has the required rigid body properties and material assignments.

A fringe benefit of this is the ability to further specify separate materials. All instances have the same material reference, and mo2 will import it once, and then create links. However, you could later assign different materials to different particles to make it visually more interesting.
Now it’s time to bake. How you do this will again depend on your software, but the process I’m referring to here works like this: In realtime (no bake cache) mode, every time you play the animation time-lime or your current take, the dynamics engine will recalculate everything in real time. Because of random seeds, you’ll get different results. This simulation only exists in this software though and won’t be exported automatically with an FBX file. Baking runs the simulation once, and caches the physics state (once per frame). Successive plays will now look identical, as the the dynamics are no longer simulated but rather replayed from the cache.
If you need to, set up your frame-rate before doing this!

One more thing to do: transfer the internal cached states to keyframes.
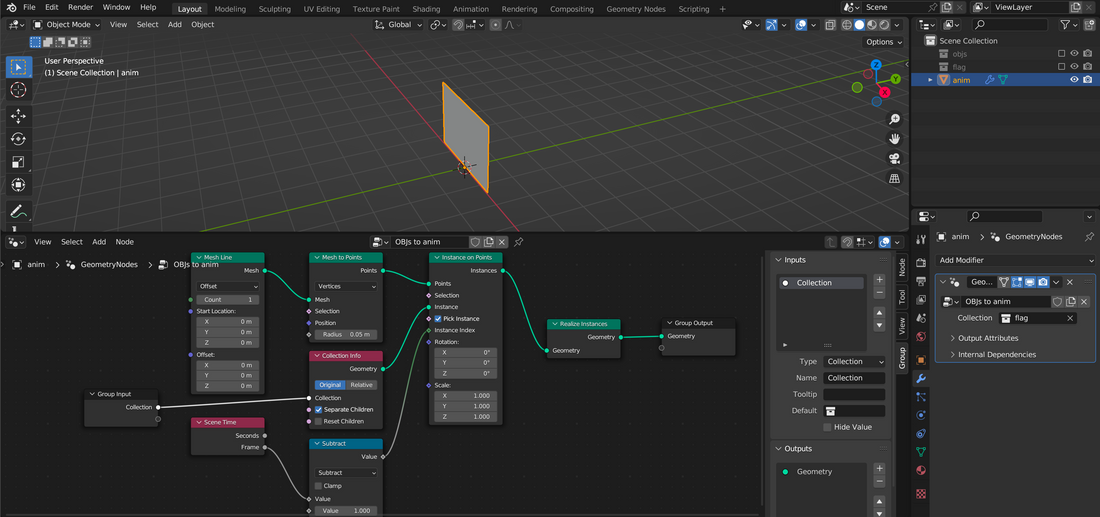
mo2 supports basic f-curve animation. Each mesh within an FBX hierarchy can be animated independently, but only the basic transformations are available: scale, rotate, translate. Other software may support vert-based movement, allowing you to bake soft-body physics, but mo2 doesn’t.
Again, this depends on your choice of software, but in Cheetah my general approach is:
- Group particles into folders (no more than 50 each)
- Switch to animation view and select a folder group
- Activate “key hierarchy” - this will ensure keyframe record commands propagate to all child objects
- Key record each frame
- ungroup all batches
- (optionally remove physics tags)
The keyframe timeline should then look like this:

And we’re done! Now export your FBX scene, paying attention again to set the correct frame-rate in the export tools.

And then import into mo2, by choosing Add -> Model -> Import. You can bake multiple different simulations as separate takes, and mo2 will pick those up (along with the take name!).
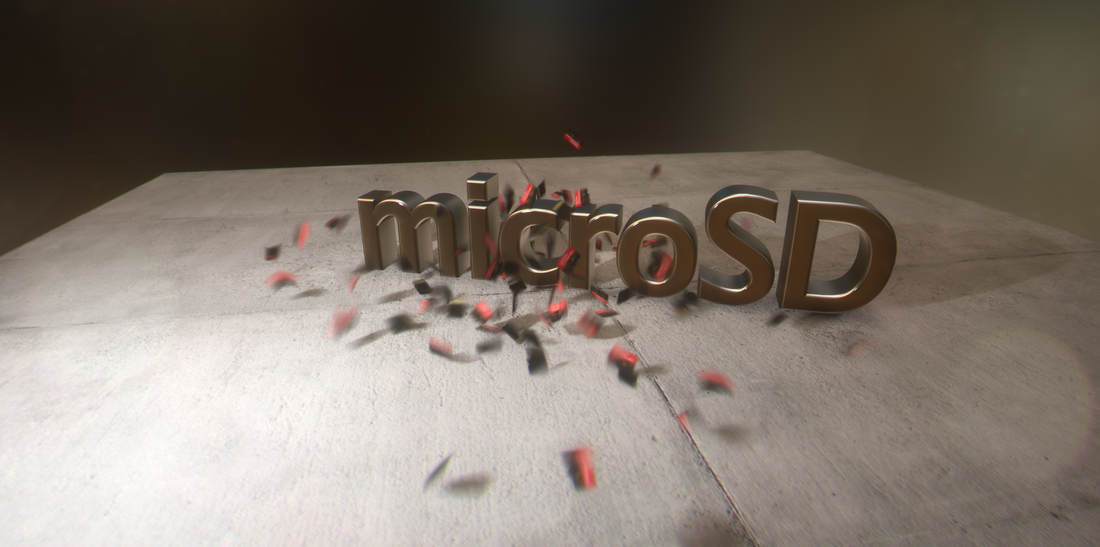
Here’s a quick render of the final result:
And another earlier test, using cube meshes: